
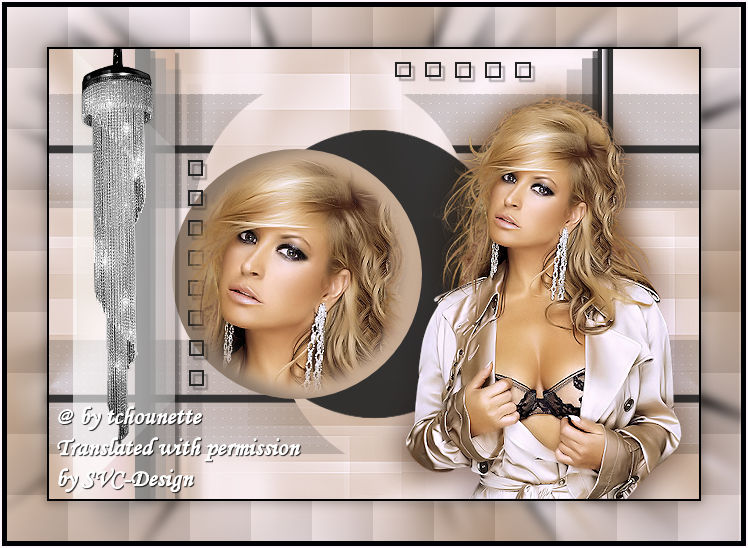
This lesson is made with PSPX9
But is good with other versions.
© by SvC-Design

Materialen Download :
Here
******************************************************************
Materials:
c0685b0f.jpg
Narah_mask_0581.jpg
anastacia01-tube-colombe.pspimage
Lampe-Strass.pspimage
TCH-Alpha-Anastacia.pspimage
******************************************************************
Plugin:
Plugin - Simple - Quick Tile
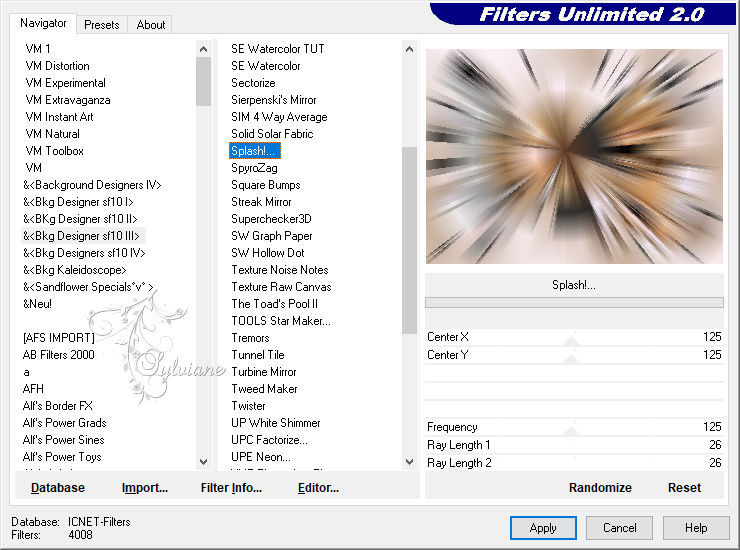
Plugins - Bkg Designer sf10 III - Splash !
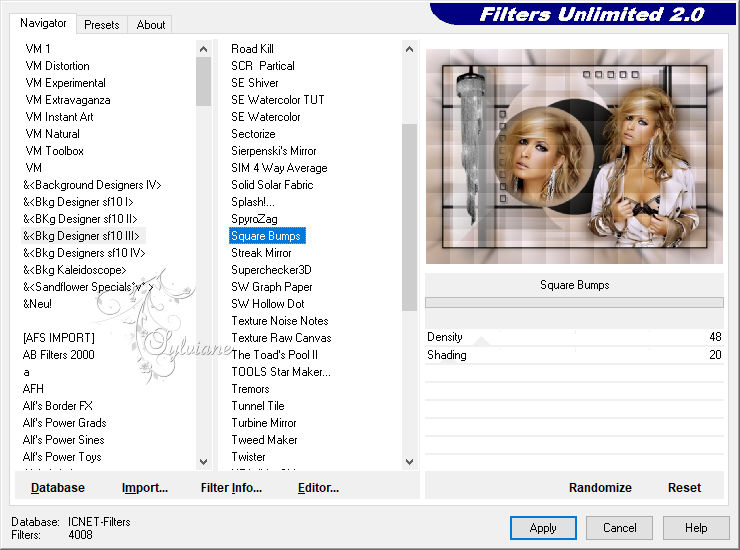
Plugins - Bkg Designer sf10 III - Square Bumps
******************************************************************
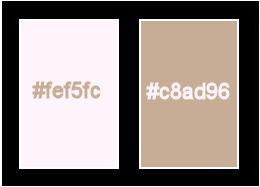
color palette
:
******************************************************************
methode
When using other tubes and colors, the mixing mode and / or layer coverage may differ
******************************************************************
General Preparations:
First install your filters for your PSP!
Masks: Save to your mask folder in PSP, unless noted otherwise
Texture & Pattern: Save to your Texture Folder in PSP
Selections: Save to your folder Selections in PSP
Open your tubes in PSP
******************************************************************
We will start - Have fun!
Remember to save your work on a regular basis
******************************************************************
1.
Open all your tubes in your PSP
duplicate the layers
and close the originals
2.
Place the color # fcf5fc in the foreground, and the color # c8ad96 in the background
3.
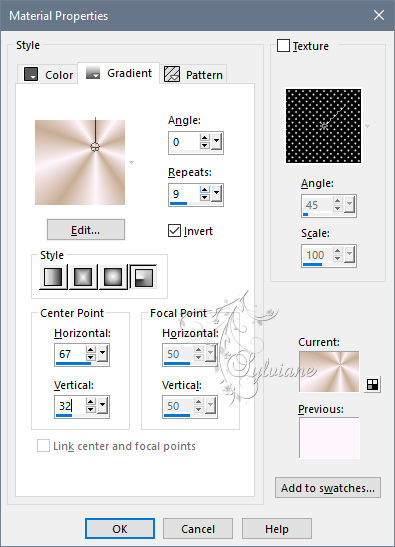
Configure your gradient: Radial Gardient
Angle: 0
Repeat: 9
Invert checked
4
Open your TCH-Alpha-Anastacia.pspimage
Window - duplicate
Minimize the original - we're working on the copy
5.
Fill the Layer with the gradient
6.
Adjust - blur - gaussian blur
Radius = 20
7.
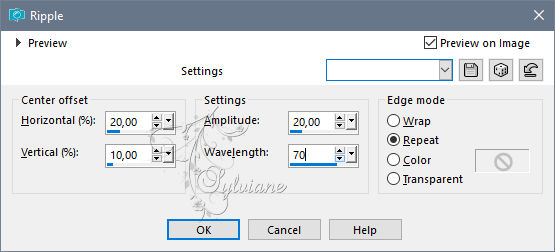
Effects - Distortion Effects - Ripple
8.
Effects - distortion effects - wave
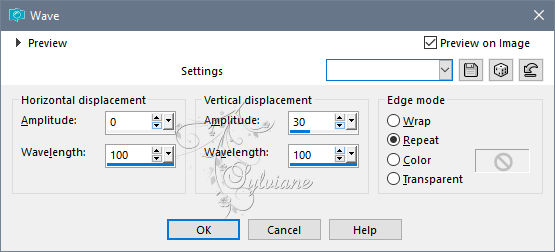
9.
Effects - Image Effects - Seamless Tiling
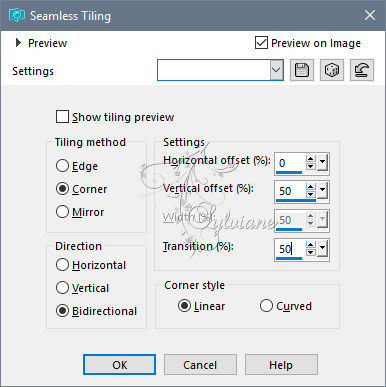
10.
Layers - New Raster Layer
11.
Fill the Layer with the color # fcf5fc
12.
Layers – Load/save mask – Load mask from disk - c0685b0f.jpg
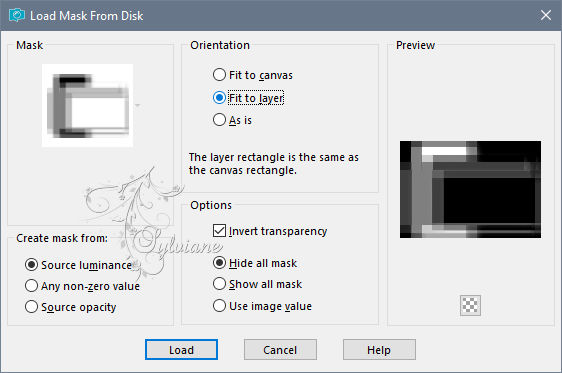
13.
Position yourself on the Mask as below:
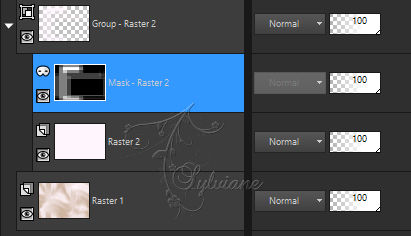
14.
Plugin - Simple - Quick Tile
15.
Effects - Edge Effects - Enhance
16.
Layers - Merge - Merge Group
17.
Layers - Duplicate
18.
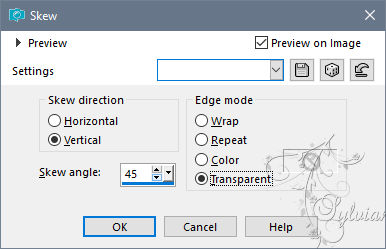
Effects - geometric effects - skew
19.
Image - Mirror - Flip Horizontal
20.
Blend Mode: screen
21.
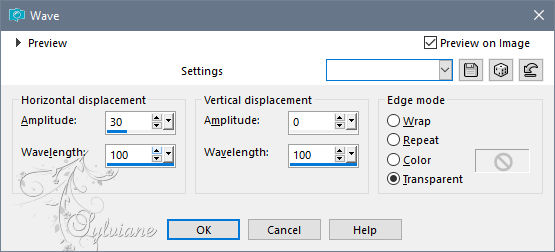
Effects - distortion effects - wave
22.
Activate the layer underneath
23.
Layers - New Raster Layer
24.
Fill the Layer with the color # 000000
25.
Layers – Load/save mask – Load mask from disk - Narah_mask_0581.jpg

26.
Duplicate the Mask
27.
Layers - Merge - Merge Group
28.
Layers - New Raster Layer
29.
Place the color # fcf5fc in the foreground, and the color # 000000 in the background
30.
Configure your gradient: Linear Style,
Angle :90
Repeat: 0
Invert not checked

31.
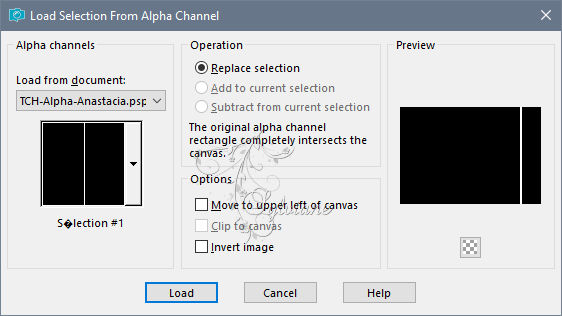
Selections - Load / Save - Load selection from Alpha Channel – selection 1
32.
Fill the selection with the gradient
33.
Selection - Select None
34.
Layers - New Raster Layer
35.
Selections - Load / Save - Load selection from Alpha Channel –, Selection # 2

36.
Fill the selection with the color # 000000
37.
Keep the selection
38.
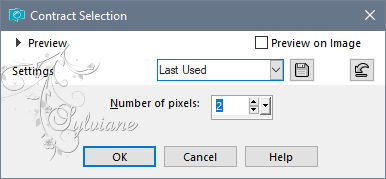
Selection - modify - contract – 2 pixels
39.
Press the Delete key. or Delete from your keyboard
40.
Selection - Select None
41.
Effects - 3D Effects - Drop Shadow
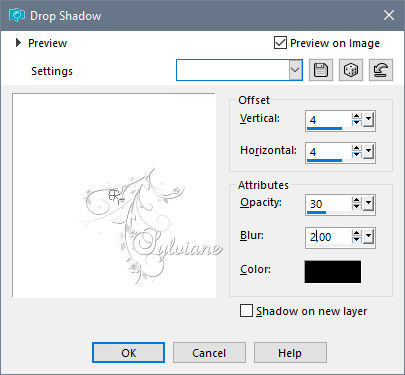
42.
Layers - New Raster Layer
43.
Place the color # fcf5fc in the foreground, and the color # c8ad96 in the background
44.
- Configure your gradient: Linear Style
Angle :90
Repeat: 0
Invert not checked
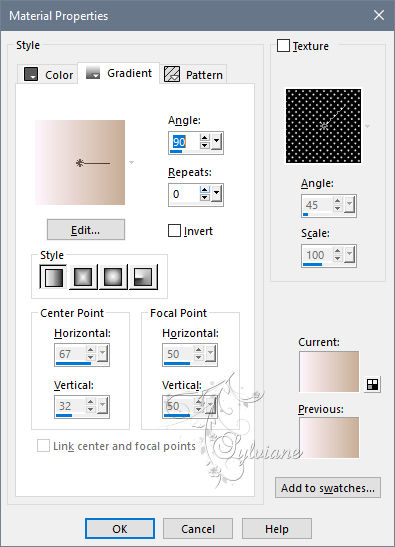
45.
Active preset shape tool - eclipse
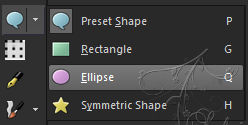
46.
With the configurations:

47.
Draw a circle on your work
48.
Modify the dimensions by modifying these configurations:

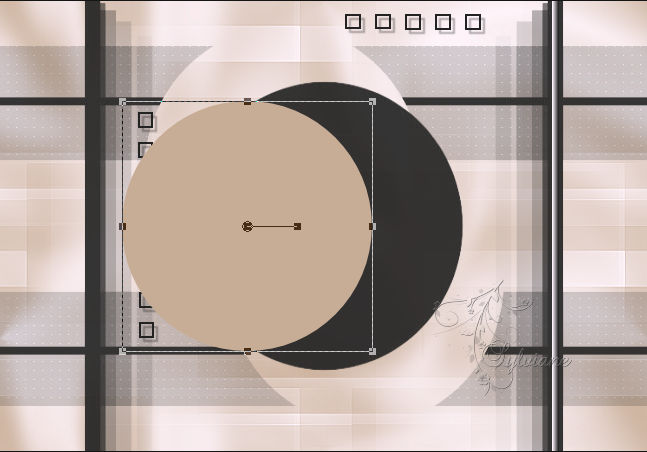
49.
convert to raster layer
50.
Layers - Arrange - Move Down
51.
Layers - Duplicate
52.
Effects - 3D effects – Cutout
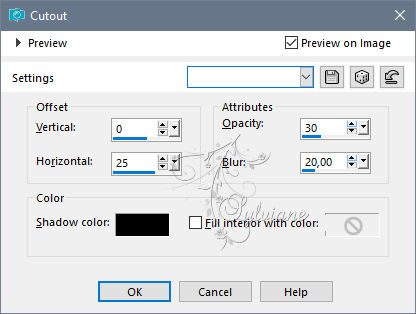
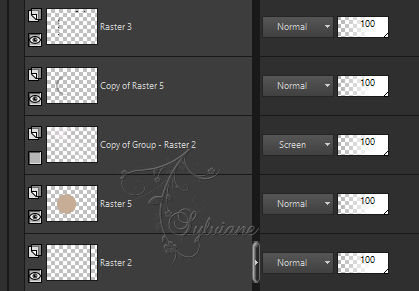
53.
Drag the Layer into the Circle and the Cutout as below
54.
Open anastacia01-tube-colombe.pspimage
Edit - Copy
Edit - Paste as new layer
55.
Layers - Arrange – Bring to top
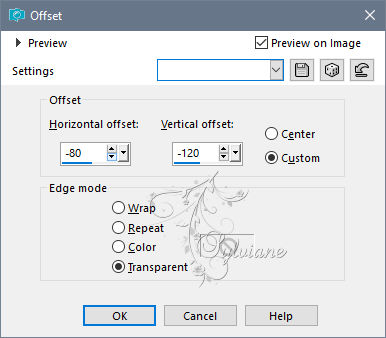
56.
Effects - Image Effects - Offset
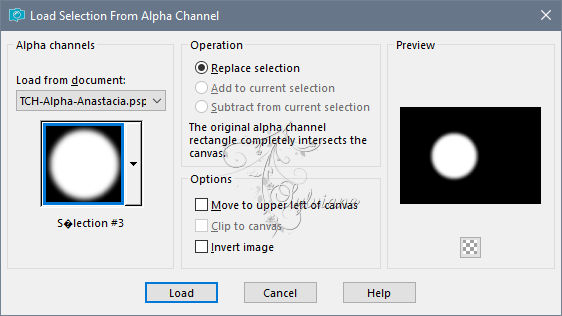
57.
Selections - Load / Save - Load selection from Alpha Channel –, Selection # 3
58.
Selections – Promote selections to layer
59.
activate the layer underneath
60.
removes this layer
61.
activate the top layer
62.
Layers - Duplicate
63.
activate the layer underneath
64.
Adjust - blur - gaussian blur
Radius = 10
65.
Layers - New Raster Layer
66.
Place the color # fcf5fc in the foreground, and the color # c8ad96 in the background
67.
Configure your gradient: Linear Style
Angle 90
Repeat 0,
Invert not checked

68.
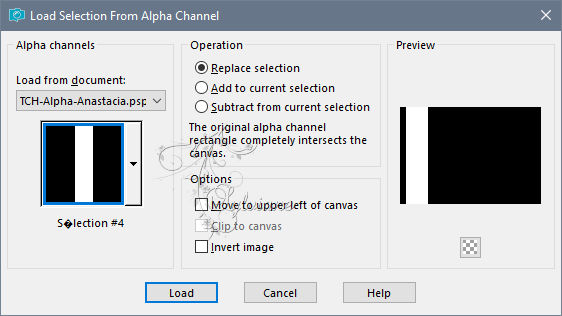
Selections - Load / Save - Load selection from Alpha Channel –, Selection # 4
69.
Fill the Selection with the gradient
70.
Keep the Selection
70
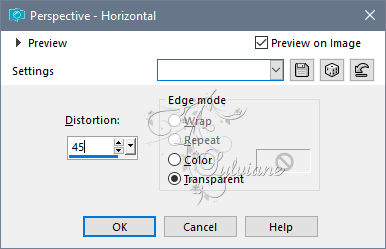
Effects – geometric effects – perspective horizontal
71.
Keep the Selection
72.
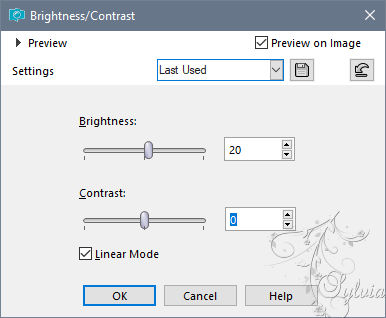
Adjust – brightness and contrast – brightness/contrast
73.
Selection - Select None
74.
Blendmode : Luminance
75.
opacity : 60
76.
Effects - 3D Effects - Drop Shadow
77.
Lampe-Strass.pspimage
Edit - Copy
Edit - Paste as new layer
78.
Activate selection tool (Press K on your keyboard)
And enter the following parameters:
Pos X : 32 – Pos Y :-4
79.
Layers - Duplicate
80.
activate the layer underneath
81.
Adjust - blur - gaussian blur
Radius = 5
82.
Layers – arrange – bring to top
83.
Open anastacia01-tube-colombe.pspimage
Edit - Copy
Edit - Paste as new layer
84.
Image, Resize to 75%,
Resize all layers not checked
85.
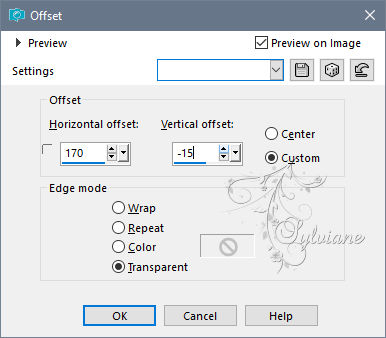
Effects - Image Effects - Offset
86.
Adjust – scharpness – scharpen
87.
Layers - Duplicate
88.
Activate the layer underneath
89.
Adjust - blur - gaussian blur
Radius = 15
90.
Blendmode: Multiply
91.
Image - Add Borders -2 pixels - color # 000000
92.
Selection - Select All
93.
Image - Add Borders -40 pixels - color # #fef5fc
94.
Selections - Invert
95.
Place the color # fcf5fc in the foreground, and the color # c8ad96 in the background
96.
Configure your gradient: Radial Style
Angle 0
Repeat 9
Invert checked

97.
Fill the selection with the gradient
98.
Keep Selection
99.
Adjust - blur - gaussian blur
Radius = 15
100.
Plugins - Bkg Designer sf10 III - Splash !
101.
Adjust - blur - gaussian blur
Radius = 5
102.
Plugins - Bkg Designer sf10 III - Square Bumps
103.
Selection - Select None
104.
Image - Add Borders – 5 pixels - color # 000000
105.
Image - Add Borders -2 pixels - color # fcf5fc
106.
Put your watermerk erop
107.
Layer – merge – merge all (flatten)
108.
Save as JPEG
Back
Copyright Translation © 2020 by SvC-Design